
Domain names you own could be your most expensive to do list. What’s more a domain without a valid SSL will show up in all modern browsers as an insecure content. In this tutorial, I will explain how to minimize the cost of owning multiple wildcard SSL-protected domains using Cloudflare and set them up with Github Pages, Heroku or NGINX.
After I did not renew yet another domain for one of my not-so-profitable-yet side projects I decided to change a strategy. Now I am hosting most of my projects on subdomains of one root domain: apki.io. I’ve used it for a couple of projects so far:
My only cost is the yearly renewal of the root domain. Each of these sites has a grade A SSL which works in all the browsers. Here’s how you can do it:
Buy a “root” domain
I usually use Gandi but it does not really matter which provider you choose. There are plenty of tutorials explaining how to buy a domain so I will not elaborate on that.
Setup Cloudflare and free SSL certificate
Cloudflare is a great service providing tons of features ranging from DDOS protection to smart caching and more. We will focus on how to use it to configure free SSL.
First, you need to move your domain’s nameservers to Cloudflare. After adding a domain to your Cloudflare panel you will be able to check if new config has already propagated. Keep in mind that it can take up to 24 hours.
Next, you need to issue a Cloudflare SSL certificate for your domain. They provide a free wildcard certificate. You can do it in a Crypto tab bar:
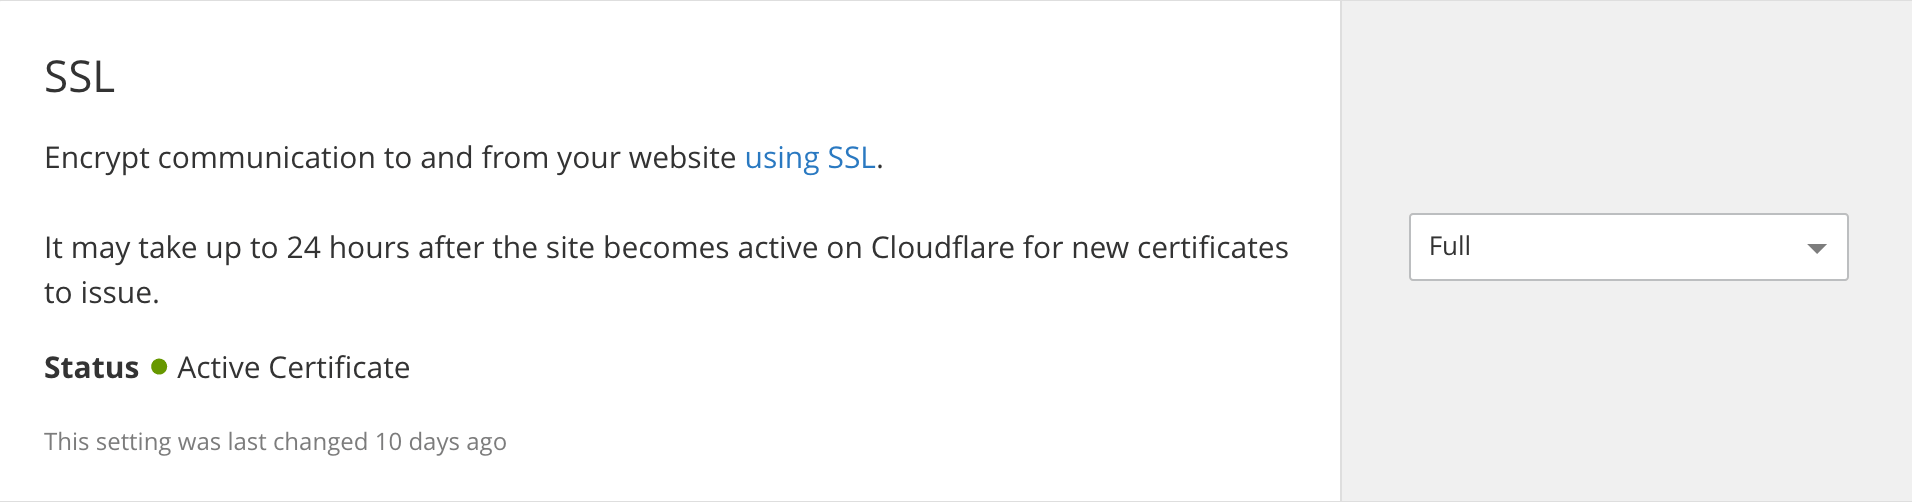
In case that after 24 hours they are still “Authorizing Certificate” you should contact support.
Setup Github Pages
Github Pages is a popular solution for hosting static pages. This blog itself is placed there and powered by Jekyll. It is free as long as you are using a public GitHub repo. Out of the box, it provides an https://[Your username].github.io domain for you, however with a minimal configuration you can setup your own domain for free.
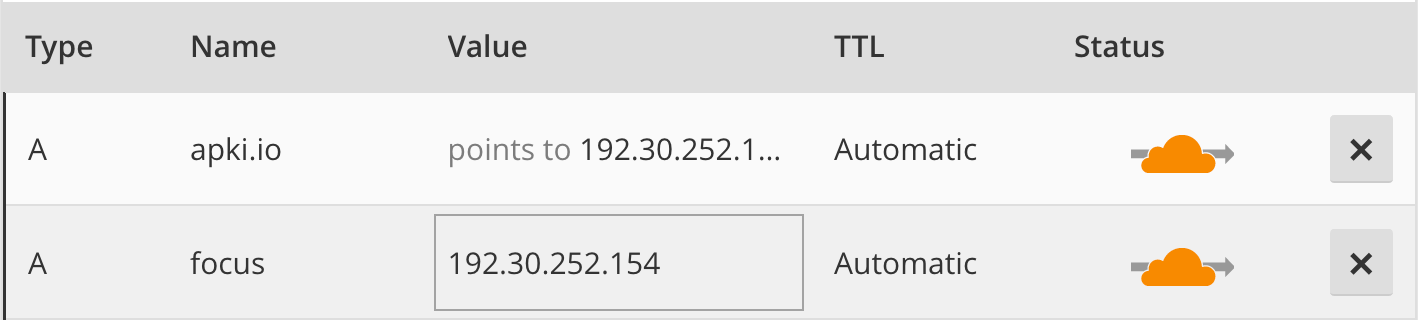
First, you need to change your DNS config to point to GitHub’s IP (192.30.252.154) using an A record. You can do it in Cloudflare DNS settings:
then in your project settings on GitHub, you should add a custom domain name:
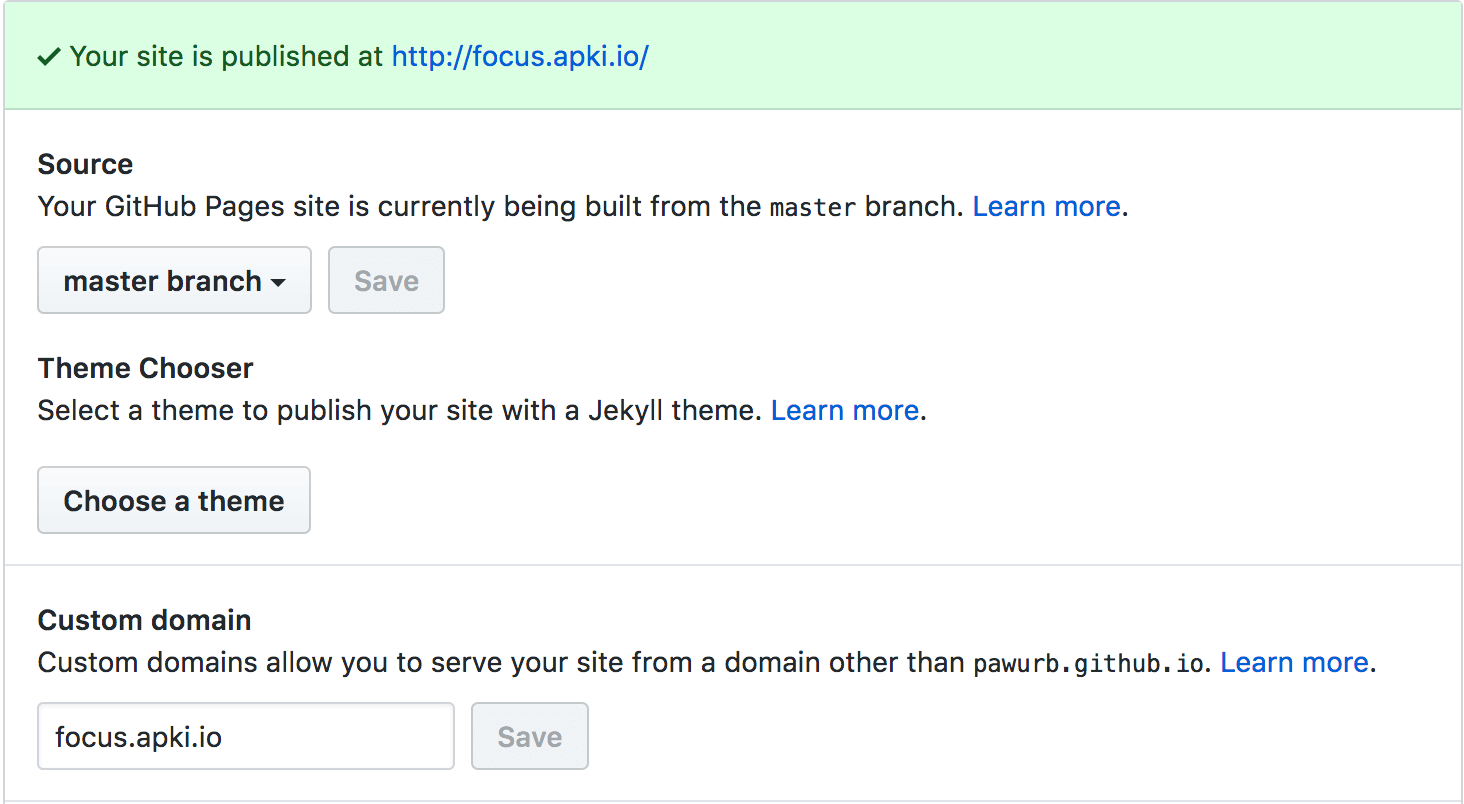
That’s it, your website should be up running.
Setup Heroku
If you need something more complex than a static page then Heroku could be a thing for you. By default, it offers an https://[Your app name].herokuapp.com domain. Same as with GitHub pages you can hook your own domain with SSL without any additional costs.
Start with adding your domain name in Heroku’s app settings:
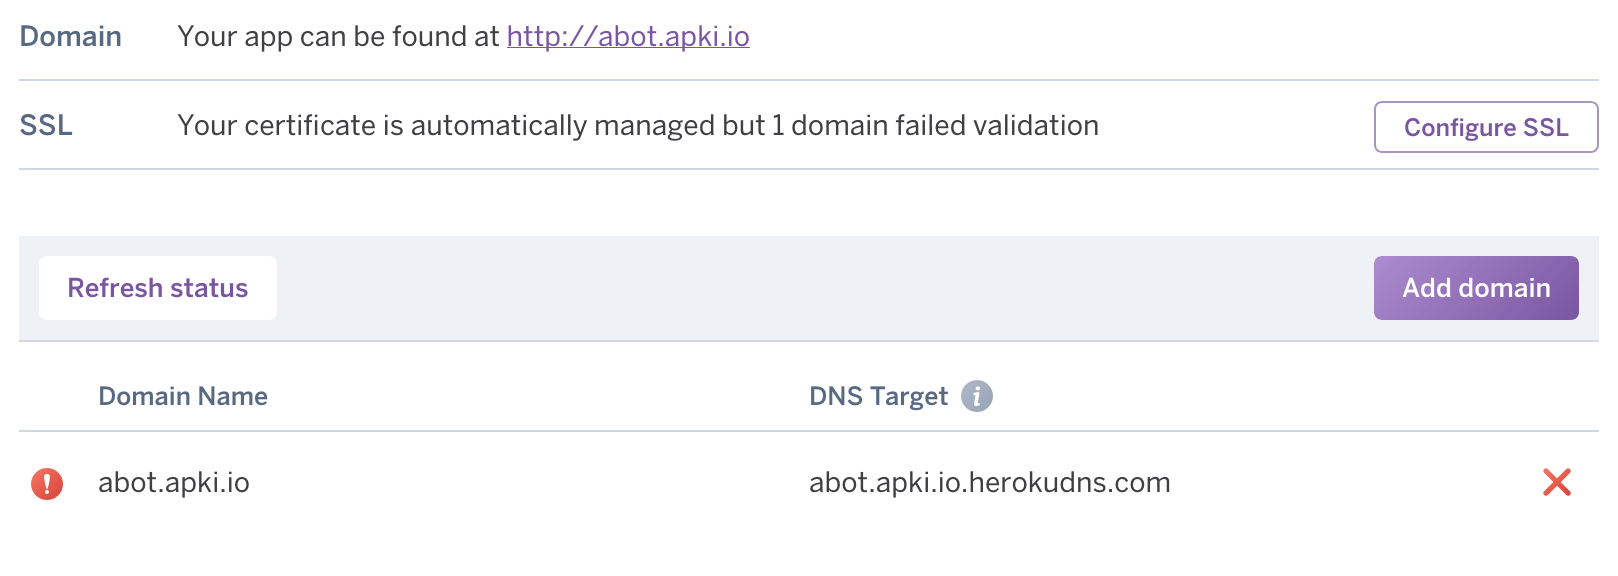 Don’t worry about those error messages, it works anyway
Then add a CNAME record pointing your subdomain to default Heroku URL in your Cloudflare DNS dashboard:
 Add a CNAME record pointing subdomain to https://[Your app name].herokuapp.com
Your Heroku app should now be available on your custom domain with full SSL support.
Setup NGINX
If you are using a custom hosting infrastructure then NGINX could be your front-end server. In this case you can still hook free SSL with a custom domain.
Start with pointing your domain to your server’s IP using an A DNS record. Next, check out two detailed articles on Cloudflare support explaining how to complete the setup:
Creating and managing certificates with Origin CA
How to install an Origin CA certificate in NGINX
Final remarks
Keep in mind that when working with DNS and SSL configuration you probably will run into some caching related issues. I usually use DNS Propagation Checker to see if changes have already been applied. Still, some of the settings could be cached locally on your computer. On macOS running these commands could help:
sudo killall -HUP mDNSResponder
sudo killall mDNSResponderHelper
sudo dscacheutil -flushcache
If it still does not work then you could check if it works on different browsers or your mobile device. Rule of the thumb, if it should work but it still doesn’t I just leave it for a couple of hours and then check again ¯\(ツ)/¯.
There’s also Let’s Encrypt you can use to setup free SSL. So far Cloudflare has always been good enough for what I needed.
Obviously, you can use all of those tips for top-level domains as well. Hope it helps you shave a few bucks off what you spend on your online projects.
Disclaimer: I’m not a web security expert. I would not recommend using these tips for a project with bank-level security requirements. Let me know in the comments if you notice some security loopholes in those settings.

