
I conduct Rails performance audits for a living. Clients usually approach me with a request to speed up the backend, i.e., optimize the bottleneck API endpoint or tune the database queries. After the initial research, it often turns out that tweaking the frontend will make a better impact on the perceivable performance than fine-tuning the backend.
In this blog post, I describe the often-overlooked techniques that can significantly improve your web app’s overall performance.
These tips apply to all the web technologies like Ruby on Rails, NodeJS, Python Django, or Elixir Phoenix. It does not matter if you render an HTML or serve an API consumed by the JavaScript SPA framework. It all comes down to transferring bytes over the HTTP protocol. Frontend performance optimization is all about making this process as efficient as possible.
Why is frontend performance critical for your website’s success?
I guess that developers often disregard the frontend performance because it doesn’t directly affect the infrastructure costs. Rendering the unoptimized website is offloaded to the visitor’s desktop or mobile device and cannot be measured using backend monitoring tools.
Developers usually work on top-notch desktop computers with a high-speed internet connection. They do not experience poor performance themselves. The UX of visiting your landing page on a 15 inch Mac Book Pro with a fiber connection cannot be compared to an old Android device on a shaky 3G network.
A typical web app issues dozens of requests on initial load. Only a few are backend-related, i.e., website HTML, API calls, etc. The majority of requests are static assets, JavaScript libraries, images. Fine-tuning the frontend-related requests will give a much greater return than shaving a couple of hundered milliseconds off a database query.
Google Bot measures the performance of your website, and it directly affects the SEO rating. Since July 2019, Google Bot is using a “Mobile first” approach to assessing your website.
You might not care about frying the CPU and wasting the bandwidth of your mobile users. Maybe landing a sweet spot in Google search results should convince you to focus on your frontend performance?
Test in your client’s shoes
“If you want to write fast websites, use slow internet.”.
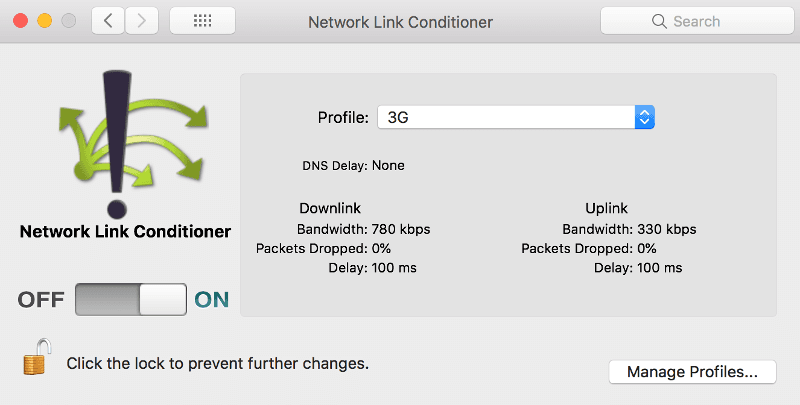
You should regularly throttle the internet speed during the development process to experience first-hand how your app will behave for most users.
On macOS, you can use the Network Link Conditioner to do it:
Also, both Firefox and Chrome developer tools offer the option to throttle the internet speed in the Network tab:


Maybe the internal demos of the new features should also be done on the throttled network? Everyone in the company should have the chance to see how the app really works for most users.
Reconnaissance
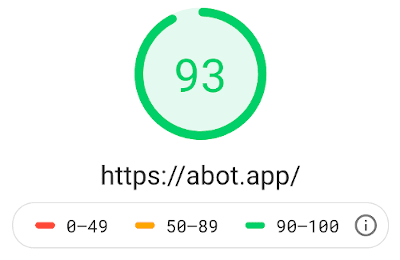
Discovering frontend issues is usually more straightforward than backend ones. You don’t even need admin access to the website. By definition, the frontend issues are in the frontend. You can scan and diagnose every website out there. I use the following tools to perform the initial scan:
There’s no reason why ANY website shouldn’t score top on each of those tools. Read on if your score is anywhere below 90%.


Client-side caching
Correctly configuring client-side caching is the most critical frontend optimization. I’ve seen it misconfigured in multiple production apps so far. Webpack comes with a great mechanism to easily leverage client-side caching, i.e., MD5 digest. The production assets generation process must be configured to append the MD5 digest tag to the filename.
It means that in the production environment, the application.js file becomes application-5bf4f97...95c2147.js. The random suffix is generated based on the file contents, so it is guaranteed to change if the file changes. You must add the correct cache-control header to make sure that once downloaded, the file will persist in the browser cache:
cache-control: public, max-age=31536000, immutableThe immutable parameter ensures that cache is not cleared when the user explicitly refreshes the website on the Chrome browser.
If you’re using NGINX as reverse proxy you can use the following directive:
location ~* \.(?:ico|css|js|gif|jpe?g|png|woff2)$ {
  add_header Cache-Control "public, max-age=31536000, immutable";
  try_files $uri =404;
}
I’ve seen many apps using Etag and Last-Modified headers instead of Cache-Control. Etag is also generated based on the file contents, but the client has to talk to the server to confirm that the cached version is still correct. It means that on every page visit, the browser has to issue a request to validate its cache contents and wait for 304 Not Modified response. This completely unnecessary network roundtrip can be avoided if you add a Cache-Control header.
Limit bandwidth usage
Nowadays, websites are just MASSIVE. It often takes multiple MBs to render a static landing page. Let me point out the most common mistakes that affect it and how they can be resolved.
Compress and resize images
There’s no excuse for serving uncompressed images on your website. You must make sure to process all your images with tools like Compressor.io. There’s often no perceivable difference for images processed with Lossy compression, and it usually means ~70% size reduction.
Resizing an image to the size that it actually needs is often overlooked. To check it, visit your website using Firefox on a large desktop screen, right-click the image, and select View image info. You’ll see what dimensions the image needs vs. how large it is now:

Make sure first to resize the image and only then compress it. Otherwise, you might lose quality.
Defer images loading
You should defer the loading of the images that are not visible in the initial viewport. During the initial load, dozens of requests are competing for network throughput. Delaying the transfer of unnecessary images will leave more resources for necessary assets like CSS stylesheets etc.
There’s plenty of different JavaScript libraries that offer this feature. Including them means additional bandwidth usage, so I prefer to keep things simple and use a native loading='lazy' HTML attribute.
It has decent browser support. Have a look at how it affected one of my blog posts:

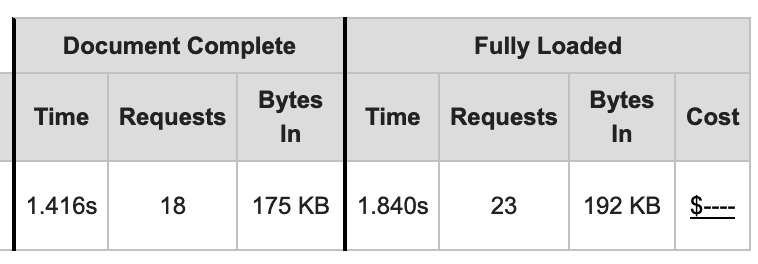
As you can see, adding loading='lazy' to all the images reduced ten requests and over 250kb of transfer on the initial load. That’s a massive deal for slower internet connections!
Enough with the GIFs already…
GIFs are HUGE! I understand you want to showcase a fancy UI on your landing page, but maybe you could use a lazy-loaded movie clip instead? 10MB GIF can be converted to 250kb mp4 file… Twitter automatically changes GIF images to mp4 files, so I’d trust them on this one.
Cherry-pick and measure dependencies size
Many frontend libraries offer a modular approach to including them in your application. For example, Bootstrap allows you to customize the build to include only the components you need.
Some popular libraries have lightweight alternatives. Since recently, ChromeDevTools suggests them, so make sure to use it for your application.
Reconsider 3rd party dependencies
Overusing externally hosted 3rd party JavaScript libraries is the simplest way to kill the performance of your website.
Dropping in yet another <script src="..."> tag might not seem like a big deal. It’s easy to forget that one script can result in a cascade of requests, each including more resources. Here’s the cost of embedding sample 3rd party JavaScript libraries:
| Requests | Bandwidth (total/gzipped) | |
|---|---|---|
| Google Analytics | 4 | 104.09 KB / 40.37 KB |
| Simple Analytics | 2 | 5.29 KB / 3.12 KB |
| Twitter button | 8 | 173.68 KB / 59.30 KB |
| Disqus | 26 | 862.55 KB / 271.48 KB |
| Commento.io | 5 | 64.73 KB / 19.25 KB |
The only 3rd party JavaScript dependency I use for this blog is Commento.io for comments. It’s over 10x lighter than its alternative Disqus.
I’ve switched from using Google Analytics to SimpleAnalytics long ago. Recently I’ve decided I don’t need to track the visitors of this blog at all. Summary visit stats from Cloudflare are enough for me.

Including 3rd party libraries from external sources often reduces your ability to set correct caching headers, thus hurting your performance score.
You should always look for the most straightforward tool that meets your requirements and only resort to using 3rd party if you cannot develop the lightweight solution yourself.
HTTP 2
HTTP 2 offers massive performance improvement over HTTP 1.1 for loading static assets. Headers are compressed to reduce bandwidth. Even more important is that multiple assets can be loaded in parallel over a single HTTP connection.
It might not be critical for API calls, but for static assets, you should enable HTTP 2 and expect serious performance gains.
How to do it depends on your infrastructure. If you’re using custom infrastructure with NGINX reverse proxy, you can check out this tutorial.
If you’re using Heroku, you’re out of luck because currently, it does not support HTTP 2. The simplest way to add HTTP 2 support for Heroku is to proxy your traffic through Cloudflare.
If you don’t want to move your application to Cloudflare’s DNS, you can always use a custom domain just for serving assets from their CDN.
Physical server location and CDN
The usage of CDN (Content Delivery Network) is critical if your user base is spread across the globe. Correctly configured CDN will cache static assets on the edge locations, significantly reducing the request’s duration. We’re talking like 50ms vs. 800ms (16x speedup) to download a single static asset. With dozens of assets needed to load the website, configuring CDN could be the second next most critical frontend optimization you can apply.
As you might have already noticed, I’m a big fan of Cloudflare. If your application is using AWS, you can also consider using CloudFront.
Enable premium networking
CDN only works for cacheable, i.e., static assets. You cannot speed up your API calls using CDN.
For this reason, you must always deploy your servers in location closest to your users. If your userbase is worldwide, you can consider adding premium networking features offered by Cloudflare and AWS.
Cloudflare’s Argo routing is a DNS level optimization. Check out the response time for this blog measured with updown.io before and after enabling Argo:
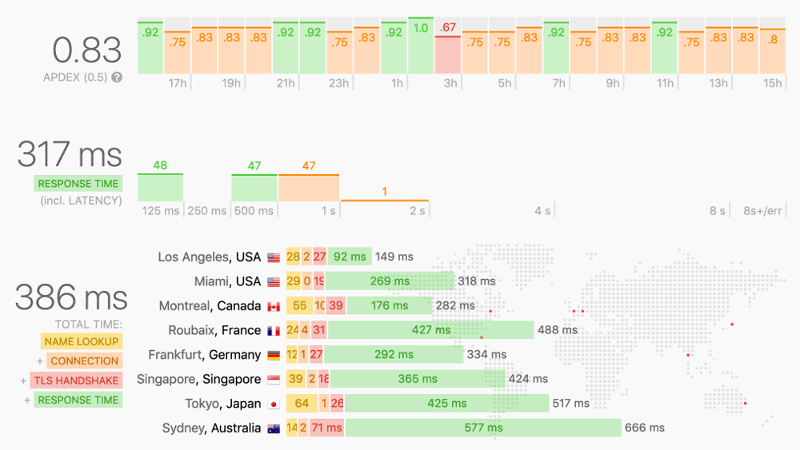
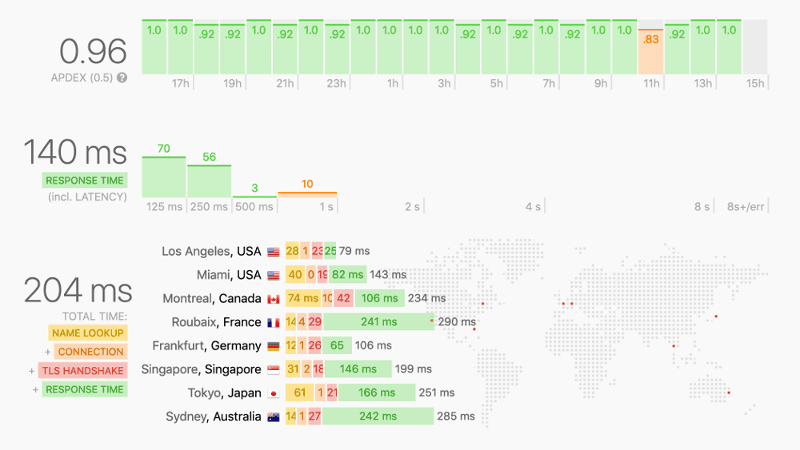
Over 100% faster response time for $5 a month? Count me in! (but watch out for pricing if you have a massive throughput…)
For AWS-based servers, you can enable Global Accelerator, which leverages the internal AWS network instead of routing traffic through the congested public internet.
HSTS header
Adding an HSTS (HTTP Strict Transport Security) header protects your website from a range of attacks by enforcing SSL connection for all the clients. A performance-related side effect is that browser will never try to connect to the HTTP version of the website but automatically redirect the user to the HTTPS version. Without an HSTS header, a request and 301 Redirect response network roundtrip would be necessary.
You can submit your website to HSTS Preload List to redirect visitors to the HTTPS version by default, even if they did not yet visit your website before.
Use the following NGINX directive to add the HSTS header:
add_header Strict-Transport-Security "max-age=31536000; includeSubDomains";Just remember that adding the HSTS header is a one-way trip and cannot be reverted.
Load JavaScript after HTML body contents
An optimization recommended by Google PageSpeed insights is to “Eliminate render-blocking resources”. They suggest doing it for both JavaScript and CSS files. I can only recommend moving all your <script... tags just before the closing </body> tag. If you do it for CSS, your users will see an ugly flicker of unstyled HTML before the stylesheets load.
Use Gzip and Brotli compression
Not using compression is wasting your users’ bandwidth. I’ve covered this topic in detail in my other blog post. I invite you to check it out when you have time.
Summary
A closer look at the frontend issues will probably give you more bang for the buck than polishing database queries. Remember that majority of your customers are probably using mobile devices with varying quality of internet connection.
Every additional request and kilobyte of transfer counts. They add up real quick. Think twice before you put a massive GIF on your landing page. Always reconsider adding yet another 3rd party tracking dependency. Does it really bring so much value to justify killing your app’s performance?
I hope those techniques will help you improve the UX of your websites. Don’t hesitate to share other frontend-related tips in the comments.

